Custom Teeth Whitening Tray (D.I.Y.) Premium Silicone Molding. Much Better Than Boil & Bite Thermofitting Trays. Review

Custom Teeth Whitening Tray (D.I.Y.) Premium Silicone Molding. Much Better Than Boil & Bite Thermofitting Trays. Feature
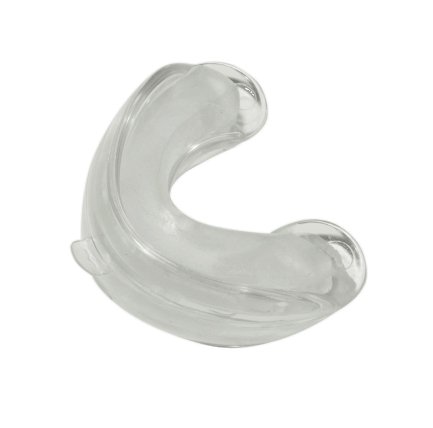
- NOW NEW AND IMPROVED VERSION! Includes breathing holes for comfortable wear during bleaching time. 10 Times better than the boil & bite trays
- Convenient, silicone based self-impression tooth tray. Made in USA!
- Uniquely formulated silicone material can withstand multiple impression-takings
- Eliminates the need for in-office tooth tray fabrication
- Long lasting premium DO IT YOURSELF custom teeth tray with holding box
This premium tray is much better than any thermo fitting boil & form trays.
THIS IS NEW 2011 VERSION! Breathing holes are added for more comfortable whitening. Only High-Quality silicone is used. MADE IN USA!
Compared to boil & form trays:
? Achieve better whitening results
? Use less whitening gel (less leakage)
? More comfortable feel
Tooth Tray Fabrication Instructions (also included with your shipment)
1. Rinse, clean, and dry the mouth tray with white silicone impression material.
2. Hold the mouth tray at the handle, place the mouth tray in your mouth at a comfortable biting position, make sure that your teeth are aligned approximately at the center of the white silicone impression material.
3. Bite on the silicone impression material firmly until a solid impression is made on both upeer and lower arches; if failed to achieve a satisfying result, you may re-sculpt the silicone impression material back to its original shape, and try getting another impression; you may do so for as many times as you desire until a good impression is acquired.
4. Keep your teeth in the cavity of the impression, and push the mouth tray (along with the silicone impression material) inward for approximately 2mm-3mm to create spaces to hold tooth whitening gel. Try to make sure that an even distance between the impression material and your teeth to be whitened is achieved; you can make adjustments by re-sculpting and moving of the impression material.

No comments:
Post a Comment